Kubernetes-based event-driven autoscaling met KEDA: een praktische gids
Een stapsgewijze handleiding voor het implementeren van KEDA binnen je eigen cluster en het gebruiken ervan om een praktische use case op te lossen.

In dit Engelstalige artikel beginnen we met een uitleg van wat Kubernetes Event Driven Autoscaling (KEDA) inhoudt. Vervolgens richten we een lokale ontwikkelomgeving in die het mogelijk maakt om KEDA te demonstreren met behulp van Docker en Minikube. Daarna leggen we het scenario uit dat geïmplementeerd zal worden om KEDA te demonstreren, en doorlopen we dit scenario stap voor stap. Aan het einde van het artikel heeft de lezer een duidelijk beeld van wat KEDA is en hoe hij of zij zelf een architectuur met KEDA kan implementeren.
What is KEDA?
Introduction to Kubernetes and KEDA
Kubernetes (K8S) is a powerful open-source container orchestration platform that simplifies the deployment, management, and scaling of containerized applications. It automates tasks like load balancing, scaling, self-healing, and application rollout, making it easier to maintain and scale applications across a cluster of machines.
KEDA in turn is a lightweight component that can be easily installed within a K8S cluster, with the purpose of enabling autoscaling for workloads based on external event sources. It seamlessly integrates with Kubernetes, extending its functionality to enable autoscaling based on various event-driven triggers, such as message queues, streaming platforms, and databases. KEDA helps Kubernetes accommodate workloads that experience fluctuating demand patterns or are event-triggered, ensuring optimal resource utilization and responsiveness.
KEDA proves invaluable in scenarios where applications exhibit dynamic and unpredictable workload patterns. If your workloads are subject to fluctuating demand based on external events, such as bursts of incoming messages, varying data processing requirements, or sporadic batch processing, KEDA is an ideal solution. Moreover, for applications reliant on message queues, streaming platforms, or databases that experience intermittent spikes in activity, KEDA ensures seamless scalability. By dynamically adjusting resources in response to real-time demands, KEDA guarantees that your applications maintain optimal performance levels, even under the most unpredictable conditions. It's particularly well-suited for environments where efficient resource utilization and responsive scalability are paramount.
ScaledObjects and ScaledJobs
At the heart of KEDA is its ScaledObject custom resource definition (CRD), which provides a powerful way to define autoscaling rules for Kubernetes Deployments and other workloads. KEDA monitors external event sources such as Apache Kafka, Redis, and Azure Service Bus, responding to incoming events and orchestrating the scaling of workloads through Kubernetes’ native mechanisms. In addition, KEDA's introduction of ScaledJobs further enhances the autoscaling ecosystem by enabling the dynamic creation and management of Kubernetes Jobs in response to event-driven triggers. With KEDA, Kubernetes not only optimizes resource utilization but also excels in maintaining responsiveness and adaptability in all types of complex application scenarios.
Heart of the KEDA ecosystem: KEDA Operator and KEDA Metrics API Server
When engaging with KEDA, two key components draw the attention: the Keda Operator and the KEDA Metrics API Server. These components, deployed as pods within the Kubernetes cluster under the namespace keda serve distinct roles and functions. The Keda Operator is responsible for managing the lifecycle of scaled resources, while the KEDA Metrics API Server efficiently handles the reception and processing of scaling-related metrics. Let's delve into each component's purpose in more detail:
KEDA Metrics API Server (keda-metrics-apiserver): The KEDA Metrics API Server plays a pivotal role in KEDA's autoscaling mechanism. This pod collects crucial metrics from external sources like message queues, databases, or custom APIs. These metrics serve as the foundation for KEDA's dynamic scaling capabilities. By exposing these metrics through its API, the KEDA Metrics API Server enables communication between your application and the KEDA Operator.
KEDA Operator (keda-operator): The KEDA Operator is the intelligence behind KEDA's autoscaling. Operating in its pod, the KEDA Operator constantly monitors the metrics provided by the KEDA Metrics API Server. It interprets these metrics, analyzing the workload demands of your application. When needed, it gracefully adjusts the number of pod replicas in response to changing load patterns. This ensures that your application optimally utilizes resources while maintaining performance and responsiveness.
Together, the keda-metrics-apiserver pod and the keda-operator pod create a synergy. The metrics collected by the API server empower the operator to make informed scaling decisions, resulting in an efficient and adaptive Kubernetes environment that is fit for scaling based on events. See the following documentation regarding the KEDA architecture on the KEDA website.
For a comprehensive understanding of KEDA's inner workings, including its architecture and the variety of triggers available for both ScaledJobs and ScaledObjects, you can refer to the official KEDA website. However, in the context of this article, which centers around practical implementation, let's now transition our focus to a hands-on practical example.
Requirements
Before starting the hands-on guide, some requirements must be in place. Firstly, please clone the code from this Github page, so you can work along with the tutorial. Also, these tools will have to be installed:
- Minikube + Kubectl: To work along with the practical example, you will use Minikube to have a local cluster on our computer. Also, the Kubernetes CLI (Kubectl) must be installed to interact with the cluster.
- Docker: Installing Docker is also required, since you will use it as the underlying container manager for Minikube, but also because it will be used for creating custom Python-based images which will be used for the scaled deployments.
- Python: Although technically optional, since the Python code will run in the K8S cluster, it is nice to have to enable local testing of the Python code in the project.
- KEDA: KEDA has to be installed into the Minikube cluster after the cluster has been installed and started.
You will now be guided through the installation in the setup chapter below.
Setup
If you do not have Docker installed yet, please install it for your operating system from https://www.docker.com/. After this, you can install Minikube.
Minikube is a lightweight, single-node Kubernetes distribution that allows developers to run a local Kubernetes cluster for development and testing purposes.To install it, follow the guide at https://minikube.sigs.k8s.io/docs/start/ for the operating system that is applicable to you.
After installing Minikube, run:
minikube startTo make sure that the cluster will either start or has already started. Now that Minikube is up and running, also make sure to install the kubectl tools from here. After installation, run this inside your terminal:
kubectl get podsIf kubectl wat successfully installed, running the command should show a message stating ‘No resources found in the default namespace’ in your terminal.
Lastly, install KEDA into the Kubernetes cluster by running the following command:
kubectl apply -f https://github.com/kedacore/keda/releases/download/v2.10.1/keda-2.10.1-core.yamlThis will deploy KEDA into your local minikube cluster. Now run:
kubectl get pods -n kedaIf KEDA was installed correctly, you should see one pod for the KEDA metrics API server and a second pod for the KEDA operator, as shown here:

The pods might take a minute or two to start, but eventually the pods should show READY ‘1/1’ and a STATUS of Running.
Having installed Docker, Minikube, Kubectl and KEDA, you are now ready to start using KEDA inside your Minikube cluster for autoscaling workloads.
Use case
Let's illustrate KEDA with a straightforward scenario. It's important to note that in real-world applications, KEDA might be considered overkill for a task this simple. Nevertheless, it serves well for demonstration purposes. In this scenario, you will generate CSV files spanning 6 months, with one file for each day. Each CSV will comprise 200 records featuring a random timestamp for the respective day, an item id selected randomly from a range of 1 to 5, and a random quantity sold, ranging from 1 to 10. These raw CSV files will adhere to the naming format 20220101.csv and will be saved in the data/raw directory.
You can access the Python script responsible for generating these CSV files here. The generated CSV files will be created and saved on a persistent volume within the cluster, facilitated by a containerized one-time job (refer to the K8S manifest here). This job will execute a Docker image that includes the Python script.
Additionally, another Python process, available here, will be deployed within the cluster as a KEDA scaledJob (view the K8S manifest here). This process will actively monitor the generation of these CSV files. Upon the creation of each CSV file, the process will trigger jobs using the provided code, initiating a series of tasks. These jobs are designed to process individual CSV files, where they will aggregate records based on the item ID, ultimately calculating the total quantity of the item sold on the specific day. The resulting aggregated CSV files will be named according to the format 20220101_aggregated_sales.csv and will be stored in the data/processed folder.
To make the setup work and to check if files have been aggregated as intended some other components next to the job definitions will be needed in the cluster:
- Redis Server: Within the cluster, a Redis server will be deployed, serving as a straightforward queue. To accomplish this, a Redis list named csvs-to-process will be established. A Redis list is one of several triggers that can activate a KEDA scaled object and is characterized by its lightweight nature.
- Persistent Volume Claim: Furthermore, a persistent volume claim (PVC) will be initiated. This PVC can be mounted to both the data generator job, which will store the raw CSV files on the PVC, and to the scaled job responsible for aggregating the CSVs. The scaled job can utilize the PVC to access raw CSV files for processing and subsequently write the aggregated CSVs onto the PVC.
- Inspection Pod: An inspection pod will also be launched within the cluster, which can be attached to, to inspect the aggregated files.
Implementation
Having clarified all the components of the system, implementation of the use case can start. The first step involves launching the Redis server, creating the PVC, and initiating the data inspection pod. After this, Docker images containing the data generator code and the CSV processor code will be built and pushed to a Docker registry hosted on the local Minikube instance. Following these preparations, the scaled job responsible for aggregating the CSVs will be deployed.
Finally, with all prerequisites fulfilled, CSVs will be generated by deploying the CSV generator job. This action will prompt the scaled job to dynamically scale up, efficiently aggregating the generated raw CSVs.
Redis
To launch the Redis server, simply run the following two commands from the project root directory:
kubectl apply -f manifests/deployments/redis-deployment.yaml
kubectl apply -f manifests/services/redis-service.yamlApplying the first manifest will deploy a Redis server into the Minikube cluster, the container will be exposed on port 6379 (the default port for Redis server). Applying the second manifest establishes a service that allows other components within the cluster to easily interact with the Redis deployment, enabling efficient data sharing and communication.
Now run:
kubectl get deploymentsWhich should show something resembling the following if all went well:

To see if the service is also deployed run:
Kubectl get servicesThis should show the following if the service was deployed successfully:

Please save the value of the CLUSTER-IP for the Redis service (10.96.78.86 in the above) since this will be needed for deployment of the (scaled)jobs.
Persistent Volume Claim for Storing CSVs
To enable creation, aggregation and reading of csv’s across pods that will be running the jobs that are defined later in the Kubernetes cluster, a place is needed to store the files. For the purpose of storing the data and enable sharing of the same data between the different Kubernetes pods, a persistent volume claim (PVC) is created, which will enable data storage on the K8S cluster:
apiVersion: v1
kind: PersistentVolumeClaim
metadata:
  name: data-pvc
spec:
  accessModes:
    - ReadWriteOnce
  resources:
    requests:
storage: 1GiAs evident from the manifest, the PVC is configured to request 1Gi of storage, which is more than adequate for our storage requirements. To initiate the creation of the PVC, execute the following command:
kubectl apply -f manifests/volumes/data-pvc.yamlUpon successful execution of the command, a message will be displayed in the terminal indicating persistentvolumeclaim/data-pvc created, confirming the successful creation of the persistent volume.
Data Inspection Pod
To be able to inspect both raw and processed csv files stored in the PVC, a helper pod will be launched using the following manifest code:
apiVersion: v1
kind: Pod
metadata:
  name: pvc-inspection-pod
spec:
  containers:
  - name: busybox
    image: busybox
    command:
      - sleep
      - "3600"
    volumeMounts:
    - name: data-volume
      mountPath: /data
  volumes:
  - name: data-volume
    persistentVolumeClaim:
      claimName: data-pvc
  restartPolicy: Always
The pod runs a simple busybox image, attaches the PVC to the /data mountPath, and executes a sleep 3600 command upon launch. To deploy the inspection pod, run:
kubectl apply -f manifests/helpers/pvc-inspection.yamlWith the restartPolicy set to Always, the pod will continue to run, enabling execution into the pod by using the following command:
kubectl exec -it pvc-inspection-pod -- /bin/shPython Docker Images
To execute the data generator job and the scaled CSV processor job, we will create and push Docker images to a container registry hosted on the Minikube cluster. To activate the registry, an addon must be enabled within Minikube. This can be achieved by executing the following command:
minikube addons enable registryOnce completed, the subsequent commands can be employed to facilitate the transfer of local Docker images to the Minikube cluster's container registry. Please choose the appropriate set of commands based on your operating system:
For MacOS:
docker run --rm -it --network=host alpine ash -c "apk add socat && socat TCP-LISTEN:5000,reuseaddr,fork TCP:$(minikube ip):5000"For Windows:
kubectl port-forward --namespace kube-system service/registry 5000:80
docker run --rm -it --network=host alpine ash -c "apk add socat && socat-LISTEN:5000,reuseaddr,fork TCP:host.docker.internal:5000"For additional insight into the functionality of these commands, refer to the Minikube website. Also, note that these commands are interactive. To follow along with the tutorial, open a separate terminal and continue from there.
With the registry now configured to accept Docker image pushes, you can proceed to build and push the Docker images for both the CSV processor and the data generator using the following commands:
For the CSV Processor:
docker build -t csvprocessor -f csv_processor.Dockerfile .
docker tag csvprocessor localhost:5000/csvprocessor
docker push localhost:5000/csvprocessorFor the data generator:
docker build -t datagenerator -f data_generator.Dockerfile .
docker tag datagenerator localhost:5000/datagenerator
docker push localhost:5000/datageneratorThese commands will successfully build, tag, and push the specified Docker images to the Minikube cluster's local container registry.
Launching the ScaledJob
With the Docker images now available, the next step is to initiate the scaled job object responsible for processing CSV files whenever messages are identified on the Redis list named csvs-to-process. These messages will consist of raw CSV filenames (e.g., 20220101.csv) pushed to the Redis list by the data generator as it generates the raw files. The Python process within the csvprocessor image handles the retrieval (popping) of asingle filename from the Redis list, locating the corresponding file, aggregating the data, and writing the aggregated output file to the processed folder.
The manifest for the scaled job encompasses several components. Let's begin by examining the section that defines the actual ScaledJob:
apiVersion: keda.sh/v1alpha1
kind: ScaledJob
metadata:
  name: csv-processor
spec:
  jobTargetRef:
    template:
      spec:
        containers:
        - name: csv-processor
          image: localhost:5000/csvprocessor
          env:
          - name: REDIS_HOST
            value: 10.96.78.86
          - name: REDIS_LIST
            value: csvs-to-process
          resources:
            limits:
              cpu: "0.2"
              memory: "100Mi"
            requests:
              cpu: "0.2"
              memory: "100Mi"

          volumeMounts:
          - name: data-volume
            mountPath: /app/data
        volumes:
        - name: data-volume
          persistentVolumeClaim:
            claimName: data-pvc
        restartPolicy: Never
  pollingInterval: 10
  maxReplicaCount: 5

  triggers:
  - type: redis
    metadata:
      address: 10.96.78.86:6379
      listName: csvs-to-process
      dataType: list
      name: redis-trigger
      queueName: csvs-to-process
This manifest employs the ScaledJob kind from the keda.sh/v1alpha1 apiVersion. The csvprocessor image created earlier is utilized as the container image. Essential environment variables required by the Python process for aggregating the raw CSV files are set. Please make sure to change the REDIS_HOST IP to the IP that you got for the redis server after running kubectl get services. Notably, the PVC is mounted to the scaled job at the /app/data path, allowing files to be read from the 'raw' data folder in each job instance spawned by the scaled job. The pollingInterval determines the interval (in seconds) at which the scaled job checks the Redis list for messages, potentially leading to scaling, while the maxReplicaCount establishes the upper limit on the quantity of job replicas spawned by the scaled job.
The trigger is configured using type redis, combined with the dataType list, indicating that the scaled job will be triggered based on events in a Redis server list. The name of this list is specified both under listName and queueName. Additionally, the address of the Redis server to connect to is defined. Make sure to replace the address IP with the Redis server's IP obtained from kubectl get services (port should remain as :6379).
When combined with a pollingInterval of 10 seconds and a maxReplicaCount of 5, the scaled job will monitor the specified Redis server and the csvs-to-process list every 10 seconds. It will then scale up to a maximum of 5 concurrent job instances as needed.
To initiate the scaled job, execute the following command:
kubectl apply -f manifests/jobs/csv-processor-scaled-jobs.yamlUpon successful execution, you should observe an output similar to the following when you run the command kubectl get scaledjobs:
This output indicates that the scaled job has been deployed and is associated with the redis trigger. It has a maximum replica count of 5, and currently, no instances are active. However, the scaled job is marked as ready, signifying that it is prepared to scale up a number of job instances in response to incoming messages pushed to the Redis list.
Triggering the ScaledJob
With the scaled job now prepared to dynamically scale and monitor the Redis list for incoming CSVs, it's time to assess its functionality. To achieve this, a one-time job will be initiated within the cluster to generate the raw CSV files. This will be accomplished by utilizing the datagenerator image that was previously created, as specified in the following manifest:
  apiVersion: batch/v1
kind: Job
metadata:
  name: data-generator
spec:
  template:
    spec:
      containers:
      - name: data-generator
        image: localhost:5000/datagenerator
        env:
          - name: REDIS_HOST
            value: 10.96.78.86
          - name: REDIS_LIST
            value: csvs-to-process
        volumeMounts:
        - name: data-volume
          mountPath: /app/data
      restartPolicy: Never
      volumes:
      - name: data-volume
        persistentVolumeClaim:
claimName: data-pvcThis manifest defines a straightforward job configuration, utilizing the datagenerator image. Two environment variables are also set that are needed to send a message to the Redis list for each generated csv. Note that the REDIS_HOST once again needs to be changed for your own Redis server IP for the job to run successfully. The PVC is also mounted at the /app/data path, facilitating the storage of the generated raw CSV files.
You are now ready to deploy this job into the cluster to generate the CSV files and dispatch messages to the Redis list. As the scaled job is already operational, actively monitoring the Redis list, the deployment of this datagenerator image will promptly trigger the spawning of new jobs. To apply the job, execute the following command:
kubectl apply -f manifests/jobs/data-generator.yamlNow make sure to run shortly thereafter:
kubectl get podsThis command will reveal the ongoing creation or the existence of several pods prefixed with csv-processor,as illustrated below:
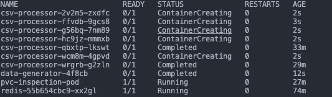
The scaled job will continuously generate csv-processor jobs, up to a maximum of 5, until the Redis list is depleted. After it is depleted, now new jobs will be generated until new messages are put into the list. Each of these jobs is responsible for aggregating a single raw CSV file, eventually writing them to the persistent volume under the app/data/processed path.
Analyzing the Result
To see if the processed files are indeed being generated by the csv-processor jobs, let’s now use kubectl exec to run a shell in the running pvc-inspection-pod:
kubectl exec -it pvc-inspection-pod -- /bin/shThis should start a shell into the pvc-inspection-pod, which has the PVC mounted at the /data path. Navigate to the processed folder by running:
cd data/processedIt should show several .csv files in the form of 20200101_aggregated_sales.csv if all went well. To check that the aggregation went well, run the following command for one of the csv-file names that are shown when you run ls inside the data/processed folder:
cat 20200101_aggregated_sales.csvThe displayed aggregated data should resemble the following pattern:

Having such output files available on the PVC confirms the effective operation of the CSV processor. If you're inclined, you can explore further with the project. Alternatively, you have the option to conclude here and remove the minikube cluster along with all deployed resources. To achieve this, execute the following command:
minikube deleteSubsequently, you can employ the minikube startcommand to initiate an entirely new cluster at a later point in time.
Conclusion
In summary, this tutorial has provided a practical walkthrough of Kubernetes-based Event Driven Autoscaling with KEDA. By now, you should have gained a solid understanding of KEDA's capabilities and components, and you've learned how to leverage it to enhance Kubernetes' autoscaling capabilities through integration with external event sources.
Throughout this tutorial, you've gained insights into the mechanics of triggering scaling based on external events, exemplified here by using a Redis list. It's worth noting that there exists a multitude of other scaling triggers that hold potential for addressing various real-world use cases.
While the use case presented here might be perceived as somewhat simple for KEDA, we hope it has met its purpose of shedding light on KEDA's internal mechanisms. This newfound knowledge hopefully equips you to confidently implement KEDA in environments like Minikube or other clusters, and perhaps even sparks solutions for real-world challenges you encounter within Kubernetes.
In conclusion, KEDA is a pragmatic solution for event-driven autoscaling in Kubernetes. Armed with insights from this tutorial, you're well-equipped to navigate the realm of Kubernetes-based Event Driven Autoscaling with KEDA, enabling efficient and responsive application orchestration in your future projects.
Need some help?
Are you interested in how Kubernetes and KEDA might play a role in your data infrastructure? Our data consultants can assist you in implementing the necessary tools to successfully integrate Kubernetes and KEDA into your environment. In addition to Kubernetes and KEDA, we can also offer insights and expertise in other areas of data engineering, as well as shaping your overall data strategy.
Join our team as a Data Engineering Consultant
Want to implement data platforms for various types of customers, while being part of a team of highly motivated data professionals? View our vacancies.
This article was written by Tim Molleman
Tim is a Data Engineer with a background in Data Science. He has experience in applying Data Engineering in financial regulation and managing traffic data, among other areas. Tim enjoys designing and implementing data pipelines and establishing robust data platforms.
Receive data insights, use cases and behind-the-scenes peeks once a month?
Sign up for our email list and stay 'up to data':